Solar panels are a popular choice for those looking to reduce energy costs and environmental impact. Proper home preparation is essential to maximize their efficiency and benefits, leading to greater savings and a healthier planet.
Key Takeaways
- Assess Energy Needs: Review your electricity bills to understand your consumption and determine the size and number of panels needed.
- Choose the Right Location: Ensure your roof or installation site receives maximum sunlight and is structurally sound for panel placement.
- Inspect and Prepare Roof: Have a professional inspect and repair your roof to ensure it can support the weight and structure of the panels.
- Trim Trees and Remove Shading: Clear any obstructions like overhanging branches to maximize sunlight exposure to the panels.
- Upgrade Home Efficiency: Invest in energy-efficient appliances, LED lighting, and improve insulation to enhance the overall efficiency of your solar system.
- Consult a Solar Expert: Seek professional advice to understand the best solar options and strategies for your specific home and location.
- Understand Financing and Incentives: Explore various financing options, rebates, and incentives available to make solar installation more affordable.
How Solar Panels Work
Solar panels are amazing tools that turn sunlight into electricity. They are made of many small parts called cells, usually from a material called silicon. When the sun shines on these cells, they create an electric flow. This flow is what powers your lights, fridge, and TV. It’s like catching a bit of sunshine and using it to light up your home!
Types of Solar Panels
When you’re looking to choose solar panels, you’ll find three main types: monocrystalline, polycrystalline, and thin-film.
Monocrystalline Panels
- These are top-notch panels made from pure silicon. They are very efficient and look sleek but can be more expensive.
Polycrystalline Panels
- These are made from several silicon pieces and are a bit less efficient but usually cost less. They are a good middle-ground choice.
Thin-Film Panels
- These panels are slim and flexible. They are different because they can be made from various materials. They are less efficient but work well in some situations, especially if you have a lot of space or need something lightweight.
Pre-Installation Steps for Solar Panels
Before installing solar panels, it’s crucial to assess your energy needs by examining your electricity consumption, ensuring your solar system matches your usage.
1. Assessing Your Energy Needs
To start, examine your electricity bills to understand your energy consumption. This step helps determine the number of solar panels required. Consider all electricity-dependent devices in your home, such as lights, appliances, and heating or cooling systems. The goal is to align your solar system size with your actual energy requirements.
2. Finding the Perfect Location
The key to successful solar panel installation is choosing the right location. Typically, your roof is the primary spot to consider, as it receives ample sunlight. Ensure its structurally sound and has the proper shape and angle for optimal panel performance. Check for obstructions like trees or tall buildings that could block sunlight. If your roof isn’t suitable, explore other locations on your property with the help of a professional to ensure your panels receive the sunlight they need to efficiently power your home.
Preparing your home for solar panel installation
Preparing your home for solar panel installation includes evaluating the roof’s structural integrity and condition to support the panels effectively. Additionally, it’s essential to remove any obstructions, such as debris or overhanging branches, to ensure the panels receive maximum sunlight.
Roof Inspection and Repair
Ensure a Solid Foundation: Have a professional check your roof’s condition. Repair any damage to make sure it’s strong enough to support the solar panels.
Tree Trimming and Shading
Maximize Sun Exposure: Trim overhanging branches and manage any obstructions to ensure your panels receive optimal sunlight throughout the day.
Upgrading Home Efficiency
Optimize for Energy Savings: Upgrade to energy-efficient appliances, improve insulation, and switch to LED lighting to reduce overall energy consumption.
Electrical System Check
Ready Your Wiring: Have an electrician inspect and possibly upgrade your home’s wiring to handle the new solar energy system safely and efficiently.
Assessing Home Layout
Plan for Panels: Consider the layout of your home and how the panels will fit. Ensure there’s enough space and the right orientation for maximum energy production.
Secure Permits and Documentation
Get the Green Light: Check with local authorities for any required permits or regulations you need to follow before installation begins.
Consult a Solar Expert
Seek Professional Advice: Before making any decisions, consult with a solar energy expert to understand the best options and strategies for your specific home and location.
The Solar Panel Installation Process
The solar panel installation process involves placing panels on your roof to harness sunlight, securing them with sturdy mounts and wiring, and adding an inverter for electricity conversion. After thorough testing for safety and efficiency, your system is ready to provide clean energy for your home.
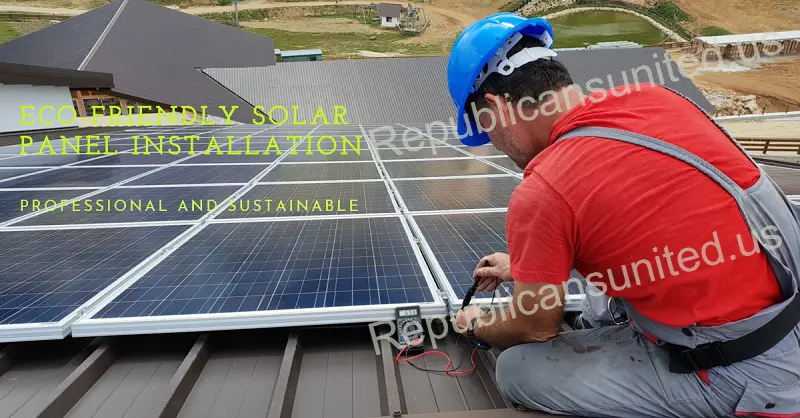
- Panel Placement: First, the installers position the solar panels on the chosen location, usually your roof, to capture the most sunlight.
- Secure Mounting: Sturdy mounts are used to securely attach the panels to the roof, ensuring they stay in place, even during strong winds or storms.
- Wiring Connection: The installers then connect the panels with wiring to link them together and create a circuit for electricity generation.
- Inverter Installation: An inverter is added to convert the direct current (DC) electricity generated by the panels into the alternating current (AC) used in your home.
- Connection to the Grid: If you’re connected to the grid, the installer will connect your solar system to it, allowing you to sell excess energy back to the utility company.
- Testing and Inspection: A thorough check is performed to ensure the system is working correctly and safely.
- Final Approval: Once everything is in order, your solar panel system is ready for operation, and you may start enjoying the benefits of clean energy and potential savings on your energy bills.
Exploring Financing Options for Solar Panel Installation
When considering solar panel installation, it’s essential to understand the costs involved. Typically, the expenses include the purchase of solar panels, installation labor, and necessary equipment. Financing options are available to make it more affordable:
- Loan Programs: Many financial institutions offer solar loans with flexible terms and low-interest rates, making it easier to cover the upfront costs.
- Leasing or Power Purchase Agreements (PPAs): With leasing or PPAs, you can enjoy the benefits of solar panels without the initial purchase cost. Instead, you pay a monthly fee to the solar provider.
- Rebates and Incentives: Investigate local and federal incentives, such as tax credits and rebates, that can significantly reduce your installation expenses.

Contributing Editor
Ikram Ullah, a content writer from Faisalabad, Pakistan, has a rich 10-year experience in the field, with a special focus on technology. His expertise lies in making complex technological concepts understandable for a wide audience. Throughout his career, he has contributed to various publications, blending local insights with global trends. Ikram's writing not only informs but also captivates, reflecting his dedication to staying abreast of technological advancements.